Regarding roof replacement, timing, preparation, and trust in the right contractor make all the difference. A roof doesn’t just shield a home from rain or snow—it anchors the entire structure’s integrity, value, and comfort. When your existing roof deteriorates, allowing water, wind, or even pests to breach its surface, a full replacement is often more economical and secure than endless repairs. We will systematically explore the complete roof replacement process, focusing on what homeowners should know, expect, and prepare for to ensure a smooth transition. This guide will be particularly helpful for anyone considering partnering with a reliable roofing company, such as Schmucker Roofing, to handle this vital home improvement project with transparency and quality.
From Inspection to Final Shingle: Understanding the Roof Replacement Journey
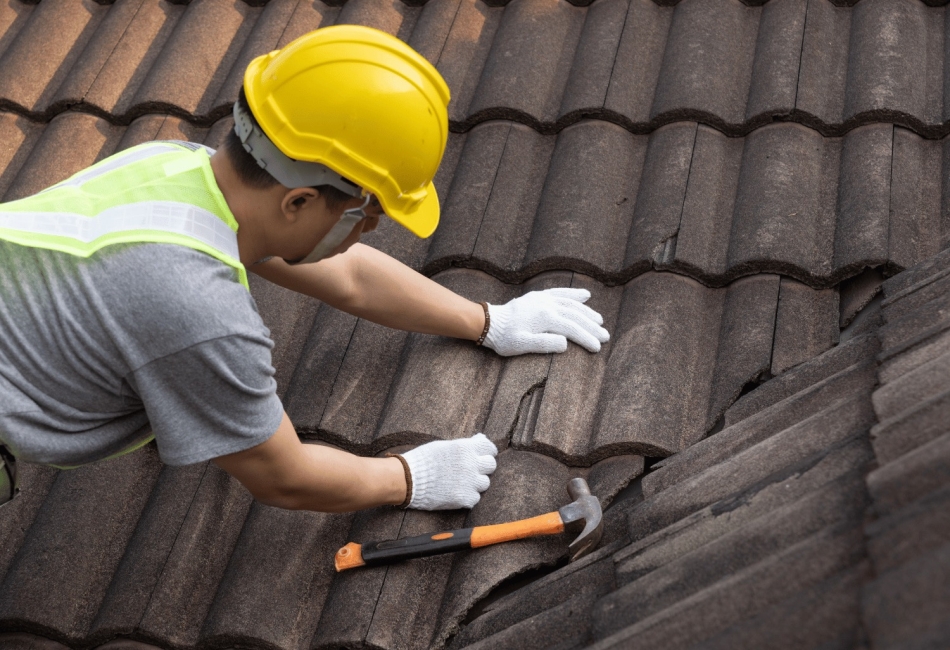
A thorough roof replacement begins long before the first nail is driven. It starts with an in-depth inspection to evaluate the roof’s current condition and identify underlying damage. Harlan Roofing contractor begins by assessing shingles, flashing, underlayment, and ventilation. An inspection may reveal soft spots caused by rot, sagging due to structural weakness, or damage from hail or wind that isn’t immediately visible from the ground. This initial step ensures that the entire scope of the replacement is understood. Once the inspection is complete, the roofing contractor drafts a proposal detailing materials, labor, timelines, and costs.
Transparency in this stage is crucial so there are no surprises once the project begins. Reputable contractors also help navigate warranty options and explain how local building codes impact material and ventilation choices. In some cases, permits must be acquired before work can begin, and having a roofing partner that manages this process alleviates stress. Homeowners should take this time to ask questions, review materials, and plan their schedule around the work. A detailed schedule will include the delivery of materials and the expected start and finish dates.
Once the materials arrive, the tear-off phase begins. Old shingles are removed using specialized tools that allow workers to strip the roof down to the deck quickly. This is a noisy, messy process, but essential for ensuring the new roof sits on a solid foundation. While some contractors may offer “roof-over” services, where new shingles are laid on top of the old ones, this approach is often discouraged. Roof-overs can hide serious issues underneath and add unnecessary weight.
During tear-off, contractors often discover hidden issues like rotting plywood, insect infestations, or water damage. These need to be addressed immediately. Quality contractors, like Schmucker Roofing, will keep homeowners informed if such surprises arise. If new decking is required, it will be installed and properly secured. Flashing is also examined and replaced at this stage if it’s rusted or poorly sealed. Flashing is vital as it directs water away from vulnerable areas such as valleys, chimneys, and vent stacks.
Once the roof deck is sound, the protective layers are installed. This usually begins with an ice and water shield applied to eaves and valleys, particularly in colder climates. Then, a synthetic underlayment is rolled out to create a waterproof barrier between the shingles and the deck. These materials improve the roof’s longevity and help prevent water infiltration. With this base in place, contractors begin shingle installation. Shingle alignment is essential not just for appearance but for function. Each shingle must overlap correctly to direct water off the roof and into the gutters.
Contractors will start from the base of the roof and work upward, often using chalk lines to ensure rows stay straight. Nails must be driven at precise locations and angles, depending on the shingle type. Improper nailing can void warranties and shorten the life of the roof. Ridge vents, which allow for proper attic ventilation, are installed last. Without good airflow, a new roof can overheat in summer and trap moisture in winter, shortening its lifespan. The installation of accessories like pipe boots and step flashing finishes the process.
Clean-up is another critical stage that often goes overlooked by homeowners but reflects the care and professionalism of a contractor. After all the shingles are in place, debris is gathered using rakes, brooms, and rolling magnets to collect stray nails from the lawn and driveway. Leftover materials and waste are removed in a dumpster or trailer. Walkthrough inspections are completed to ensure every detail meets both building codes and homeowner expectations. This includes checking that flashing is secure, gutters are undamaged, and ventilation systems are unobstructed.
Homeowners should always request a final inspection before signing off on the project. Some contractors also provide photo documentation of each phase, especially if the homeowner is away during the work. At this point, warranties are discussed again—the manufacturer’s and the contractor’s workmanship guarantee. These provide peace of mind that any future issues related to the new installation will be addressed.
A roof replacement is a major investment that brings immediate and long-term benefits when done correctly. From the first inspection to the final shingle, the process involves multiple stages, each demanding care and attention. With the right team and a clear roadmap, the stress often associated with roof work can be significantly reduced. Trustworthy communication, high-quality materials, and a clear installation strategy make all the difference in protecting your home for decades.