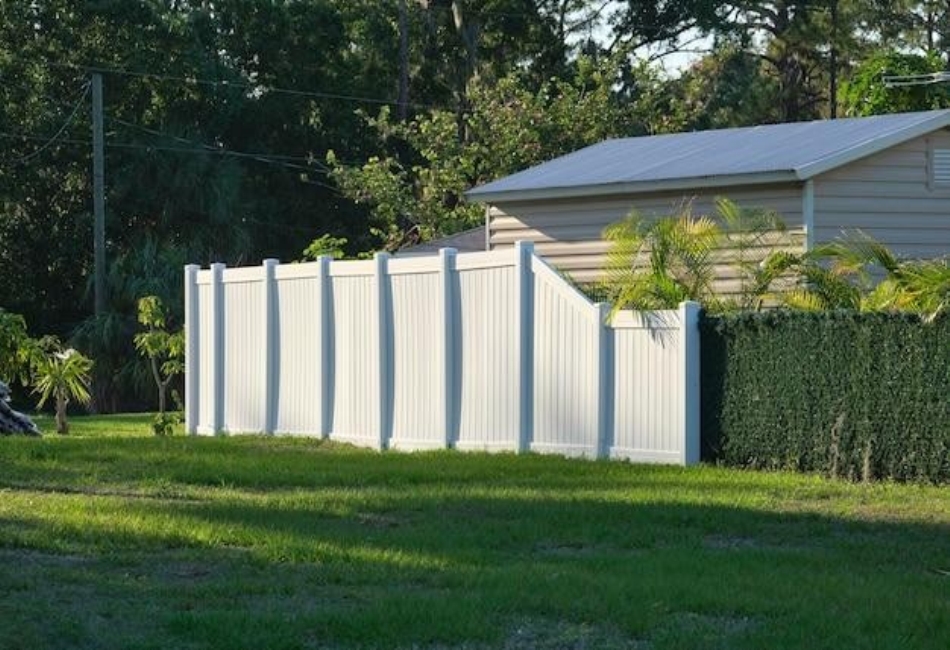
Installation of a vinyl fence is a great way to provide privacy, safety, and aesthetic appeal to your home. Vinyl fences, as opposed to wood or metal fences, are long-lasting, low-maintenance, and will not rot, rust or harbor insects. They are modern and stylish and can last for decades with minimal upkeep.
You can hire a professional but doing it yourself will save you money and be an excellent, rewarding experience. With the right tools, a good plan, and commitment, you can build a strong and beautiful fence.
This tutorial will walk you through all the steps, starting with preparing and gathering materials and ending with installing the final panel.
Step 1: Gather Your Supplies and Equipment
Make sure all the materials and tools needed are available before starting the installation process. This will avoid any delay and make the process run smoothly.
The most important materials that you will be requiring are vinyl fence panels, fence posts, post caps, concrete mix, gravel, and either brackets or screws. The materials you will want to have available are a post-hole digger, level, tape measure, string line, drill, and rubber mallet. If you have a gate, have the appropriate hinges and latch hardware.
Also, with all the materials ready in advance, you can work efficiently and have the work done with less disruption. By doing so, you also avoid mistakes, as you get to check everything first before the installation process.
Whether you’re a beginner or an experienced DIYer, having the right materials and professionals for a successful vinyl fence installation is the key. However, if the job necessitates professional intervention, it would be best to consult an outdoor fence and deck company.
Step 2: Measure and Plan Your Fence Line
The key to installing a vinyl fence is to prepare. First, decide where the fence will be located and mark the fence line with string and stakes. Second, measure carefully so that the posts are in their correct position and spaced equally.
Before digging, check local fence ordinances. There are usually height, location, and material restrictions in most places, and you may be required to obtain a permit. Talking to neighbors about common property lines may also avoid disputes.
After ensuring all, mark where all posts will be located. Because vinyl fence panels are standard sizes, the spacing must be exact so they fit together seamlessly.
This step is necessary to have an easy installation and prevent future misalignment or incorrect adjustments.
Step 3: Digging post holes and installing posts
Once the fence line is staked out, you can dig the holes for the posts. Dig holes with an auger or post digger to the minimum width and depth required for stability. Post holes should be one-third the post height plus six inches to provide gravel drainage. A 24—to 30-inch post hole will work for most fences.
Fill the bottoms of all holes with gravel a few inches deep before installing the posts. This will provide good drainage and prevent the posts from sitting in the water, which will eventually rot out the foundation.
Lastly, the fence posts are inserted into the holes and filled with concrete. Level the posts so that they are straight and in the right position. Similarly, allow the concrete to set for at least 24 hours before you hang the fence panels. This is a critical phase, as posts that are not properly positioned will lead to an unstable or wobbly fence.
Step 4: Install Fence Panels
The fourth step is installing the fence panels. Most vinyl fence systems will be attached or joined with brackets, so follow the manufacturer’s assembly instructions.
Start by installing the bottom rail between the posts. Secure it as explained and slot the fence panels into place. Once the panels are level, secure the top rail to complete the section. Level each panel with a level to ensure it is level first, then secure it into position.
When putting up a picket fence, you will likely install them individually into the rails. Space them evenly to create a sharp, professional look. Repeat down the fence line, as necessary, as you go along. Taking your time to do this will produce a sturdy and attractive outcome.
Step 5: Repair the Fence Panels and Posts
Once you have installed fence panels, check all connections and verify they are secure. Tighten the brackets or screws if needed to give fence stability. Also, verify your fence panels are securely engaged and in correct alignment if they snap into place without hardware.
If your fence is exposed to strong winds or will be used heavily, you can add post reinforcements for added strength. Some vinyl fence posts have metal inserts to add strength, particularly on gate posts or corner sections.
Walking along the fence and shaking all the panels will reveal any weak sections that need support. Keeping all the pieces securely in place will keep the fence in good condition in the long term.
Step 6: Install Post Caps and Gates
The final stage in the installation procedure is the addition of post caps and, if required, gate installation. Post caps are functional and decorative, giving the fence a finished look as they weatherproof the post tops.
In addition, most post caps snap into place, but there are a few that are held by adhesive or by screwing them in.
If your fence has a gate, carefully read the manufacturer’s installation instructions. Begin by securing the hinges to the gate post and then attaching the gate panel to the hinges. Check with a level to ensure the gate opens evenly and will not rub against the ground.
Position the latch hardware so that it is in a convenient location and securely latches.
Step 7: Review Alignment and Finalize Adjustments
Lastly, step back with the fence in full position and inspect your work. Ensure the panels and posts are in line, level, and evenly apart. Adjust any sections that are out of line before finishing the installation. Inspect the stability of the fence line by walking it, significantly if the land is sloped.
Tighten the connections or add support to posts if required to make them stronger. Getting all the components appropriately installed during this phase avoids trouble later and extends the lifespan of your fence.
Conclusion
A vinyl fence installation is a wise and worthwhile investment that makes your property more beautiful and offers extra protection. With proper planning, accurate measurement, and accurate installation procedures, it is easy to have a professional-grade fence that will last decades.
From obtaining the appropriate equipment to installing the solid posts and fixing the fence panels, every aspect is critical to successful installation. Paying attention to the tiniest details and making minor adjustments throughout the process leads to a strong, stunning fence with minimal maintenance.