Homeowners looking for McCook NE roofing company near me are often dealing with a leaky roof or a roof with a water stain in the ceiling with no known source. Most of the time, leaks are due to something other than shingles. The problem is often found in a smaller, yet more critical, roofing component: flashing. The roof flashing is what seals the roofing system at the critical vulnerable area(s), and once it fails, water will get in almost every time
Knowing the function of roof flashing and its main causes of leaking will be beneficial to homeowners so they can identify concerns before further water damage occurs. This article will discuss the more in-depth aspects of various types of flashing, including step flashing, chimney flashing, and valley flashing, and how poor or incorrect installation contributes to water intrusion.
The Function of Roof Flashing
When shingles become worn, it’s flashing that will direct the water in the proper flow patterns to guide water around and away from roof system components and other openings. Roof shingles are primarily concerned with the broad water shedding, whereas flashing is concerned with the more detailed areas of water control, particularly the edges, transitions, and intersections of the roofing system.
Areas of the roof that are of the highest risk include:
– Where any roof section meets any walls
– Around the chimney and any skylights
– Along the roof valley
– Around the plumbing vent and exhaust pipe
Flashing guides water that runs down the roof to the shingle surfaces below and creates a barrier to water so that water is not able to get below the shingles. Without flashing, the roof shingles will get rain water from roof and gravity and the water will get below the shingles and touch the roof decking.
Why Flashing is to Blame for Most Roof Leaks
Most roof leaks are in the middle of nowhere, most roof leaks are intersecting walls, they are not in the middle of a wide open shingle field. This is because water moves down to the middle of the shingle field, most roof shingles are designed to deflect water and the water will get to the middle. That is why flashing is needed, to control water shingles.
Most flashing issues are for 3 reasons
- Bad install
- Rust Or just the material isn’t good and wears down
- Just gets hit and moves
Out of all the reasons, bad install is the most common and most of the time, the material is good. Flashing that is poor quality will not prevent problems at certain points. Water control is a huge problem, walls, gaps, overlaps, sections that are not taped in the correct sequences, and the control will be bypassed.
Step Flashing: Protecting Roof-to-Wall Areas
Step flashing is installed where sloped roofs meet walls. This area is very exposed to water because water running down walls can easily get behind shingles.
Step flashing is small pieces of metal that are installed like a staircase. Each part overlaps the one below and ends behind a shingle. Each step flashing piece is designed to drain water to shingles below and not into the gap above the step flashing piece.
Step Flashing Mistakes and How to Avoid Them
Mistakes made during step flashing installation can lead to roof leaks. Mistakes include:
– On piece of metal running wall to wall instead of separate step pieces
– Not weaving the flashing with the shingles
– Nailing the vertical pieces of the flashing
– Not enough flashing piece overlap
Step flashing mistakes can lead to water going behind the siding or wall. This not only damages the visible parts of the wall but also causes hidden rot to the framing and sheathing.
Signs that show there may be problems include:
– Water marks on interior walls that are close to the roof
– Paint that bubbles on the wall
– Wallpaper that begins to peel
– Siding that rots where the wall and roof are joined
Chimney Flashing: Important and Not Simple
Chimney flashing is more than just regular roof safety. Rather than just having some steps like the regular flashing, chimney flashing has multiple parts like:
– Base Flashes
– Step Flashing
– Counter Flashing
– Cricket Flashing (for larger chimneys)
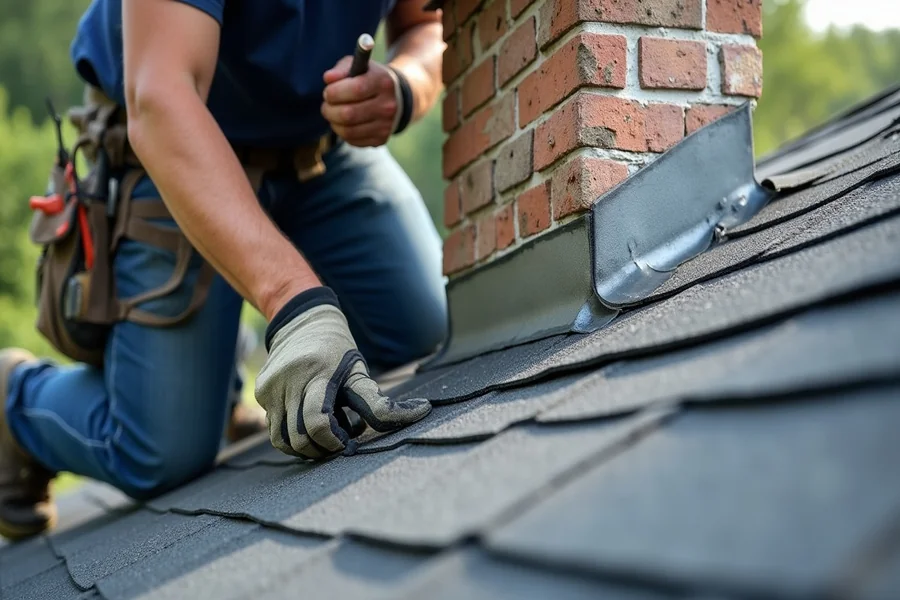
Base flashes seal the bottom area of the chimney that is closest to the roof. Step flashing works to seal the chimney’s sides. Counter flashing is built into the brick works of the chimney and overlaps with base flashes to form an even better seal. For wide chimneys, there typically is a cricket, which is a small, peaked structure that diverts water to the side behind the chimney.
### The Reason for the Failure of Chimney Flashing
The reasons for the failure of chimney flashing include the following
– Cracks in the mortar joints where the counter type flashing is set
– Poorly sealed joints
– Lack of, or improperly installed, cricket flashing
– Separation from thermal expansion
Temperature changes cause metal to expand and contract. If the flashing is not secured in place with a seal, the metal flashing will form gaps. Water often enters around the chimney and can cause stains on the ceilings of the rooms below or cause the insulation in the attic to become wet.
It is the responsibility of the homeowner to look out for the following on the chimney:
– Flashing that is rusted or is missing
– Mortar that is missing around the counter flashing
– Gaps that can be seen or metal that is raised
Valley Flashing and the Control of Heavy Water Flow
The valleys of the roof are the internal angle where two of the roof surfaces meet, and they carry a large amount of water because they receive runoff from two of the roof surfaces. Because of this, they are one of the most leak-prone areas of a roof. Flashing in the valley can be done in the following ways:
– Open valley with metal flashing showing
– Closed cut valley where the shingles are cut along the valley
– Woven valley where the shingles are interlaced
In terms of providing drainage, the open metal valley is the best because, when installed correctly, it provides the best drainage.
Problems with Installing Valley Flashing
Valley flashing helps prevent and channel water leaks on part of the roof, and if it’s improperly installed, major issues can arise, including:
– not enough underlayment installed on the underside of the flashing
– not secured enough flashing
– nails are too close to the center line of the valley
– not enough overlap on flashing sections
Water can get under the valley flashing, and if the leaks go unaddressed, they can go undetected for an extended period of time, including creating leaks that may move to different areas of your home farther away from the original leak to appear.
Valley flashing failures can be detected by
– deterioration of shingles and water at the valley line
– corrosion and rust forming at exposed and unprotected metals
– the interior of the home leaking after heavy rainfall
The Cause of Water Intrusion from Improper Valley Flashing
Roof flashing is critical in the layering of the roof to work. Each part of the roof is made to overlap each other so water can run down and not get caught in seams. If the valley flashing is done in the wrong order, tape is not used, and not enough pieces of fastening tape are used, water is allowed to go in places that are not intended by the design. Even an 1/8″ gap is big enough to cause significant water leaks and degradation to the roof. Improper fastening is the other big areas that can cause water leaks. Improperly placed nails can become a water entry hole, and overdriven nails may deform the flashing and cause large unsealed areas.
Also, incompatible sealants or underlayment may make flashing less effective. Sealants deteriorate, so flashing should never depend on a sealant to be waterproof.
How Homeowners Can Spot Flashing Trouble
Recognizing the issue early on can save a lot of money. Homeowners can take a walk around the house while looking for a number of problems, or use a pair of binoculars to search for:
– Metal that is loose or raised around a chimney
– Flashing that is rusted
– Missing pieces of flashing in the places where the roof meets the wall
– Buildup of debris in a valley
In the house, signs of trouble may be:
– Stains on the ceiling
– Odors in the attic that are damp
– Insulation that is wet
– Mold in the areas of the roof that has penetrations
Inspections should be done after every storm, as high winds can move flashing.
How Contractors Replace or Reseal Flashing
Flashers are a key part of a roof, so they are the last to go. Roofers remove the shingles around the damaged area so they can access the problem. In step flashing, each individual piece is replaced so they are able to stitch in the new shingles with the other pieces.
Chimney flashing repair involves contractors:
-Removing old counter flashing
-Grinding new reglets (grooves) into mortar joints
-Fresh counter flashing embedded
-Sealing joints using roofing tar
Regarding valley repairs, underlayment in the valley is replaced if needed, and valley flashing and adjoining shingles are replaced to ensure proper tie ins.
For minor gaps, resealing may be acceptable, but with corrosion or poor installation, full replacement is recommended.
Conclusion
Flashings role in leak prevention is greater than the shingles, even though it is not as readily seen. Because flashing is the first line of defense when it comes to roofing intersections, even small errors in installation will lead to large amounts of water intrusion.
Chimney flashing, valley flashing, and step flashing are important for homeowners to know in order to spot the signs and take action before it is too late. Most roof leaks are not random failures, but compromise of flashing.
For the flashing to do its job, it needs to be properly installed and inspected to ensure it directs water away from the structure. When flashing is properly maintained, it will serve its purpose and keep the roof and structure safe for many years to come.